Cable Label Printer? It’s Easy If You Do It Smart
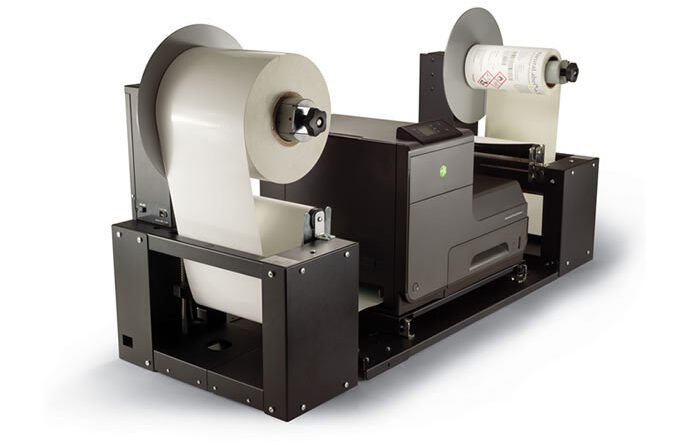
A cable label printer is a device used to print labels for cables and wires. It is used to identify cables and wires for easy identification and organization. The labels can be printed with text, symbols, and barcodes. These printers are designed to work with a wide variety of materials, including vinyl, polyester, paper, and aluminum. They are typically used in industrial settings, such as manufacturing plants and warehouses.
Benefits of Cable Label Printer
- Increased Efficiency: A cable label printer enables you to quickly and accurately label cables, wires, and other components, significantly increasing the speed and efficiency of your operations.
- Improved Organization: A cable label printer helps you organize your cables and wires more effectively, reducing the amount of time spent searching for the right cable or wire.
- Better Identification: Cable label printers apply high-quality labels that can be read easily, even in low-light conditions. These labels are also resistant to fading, so they will remain readable for a long time.
- Cost Savings: By labeling your cables and wires accurately, you can reduce the amount of time spent troubleshooting and replacing mislabeled or unlabeled connections. This can result in significant cost savings.
- Professional Appearance: Professional labeling makes your cables and wires look organized and well-maintained. It also makes it easier to identify particular cables or wires when needed.
How to Use the Right Cable Label Printer?
- Choose the Right Printer: The first step to using the right cable label printer is to choose the right printer for your needs. Consider the type of labels you need to print, the speed at which you need the labels printed, and your budget when selecting a printer.
- Set Up the Printer: Once you have chosen the right printer for your needs, it is important to set up the printer correctly. Read the printer’s manual carefully and follow the instructions for setting up the printer.
- Load the Labels: Before you can start printing labels, you need to load the labels into the printer. Make sure to use the right type of labels for your printer and follow the instructions in the manual for loading the labels.
- Connect the Printer to Your Computer: Once the labels are loaded into the printer, you need to connect the printer to your computer. Follow the instructions in the manual for connecting the printer to your computer.
- Design Your Labels: Once your printer is set up and connected to your computer, you can start designing your labels. Most cable label printers come with software that allows you to easily design your labels.
- Print Your Labels: Once your labels are designed, you can print them. Follow the instructions in the manual for printing your labels.
Applications
- Electrical Engineers: Electrical engineers use cable label printers to easily identify and organize the different types of wires and cables used in their projects. This helps them save time and effort when troubleshooting or working with complex systems.
- Network Technicians: Network technicians use cable label printers to quickly and accurately identify the different types of cables used in a network. This helps them quickly identify and troubleshoot any issues.
- Manufacturing: Manufacturing companies use cable label printers to easily identify and organize different types of cables used in their production lines. This helps them ensure efficient and safe operations.
- IT Professionals: IT professionals use cable label printers to easily identify and organize the different types of cables used in their networks. This helps them save time and effort when troubleshooting or working with complex systems.
- Homeowners: Homeowners use cable label printers to quickly and accurately identify the different types of cables used in their home networks. This helps them quickly identify and troubleshoot any issues.
Installation
- Unpack the cable label printer, read the user manual, and make sure to have all the necessary cables, power adapter, and paper roll.
- Connect the power adapter and connect the printer to the computer via a USB cable.
- Insert the paper roll into the cable label printer.
- Insert the paper roll into the cable label printer.
- Connect the printer to the computer, and turn it on.
- Test the printer by printing a test label or two.
- Once the printer is working properly, start designing your labels using the cable label software or the label templates available online.
- Print the labels and attach them to the cables.


NGL, Sprunki Will You Adopt Wenda? is low-key sus in the best way possible. The glitch effects are so well-done and they don’t break the game. Total masterpiece!
Just started playing Sprunki Will You Adopt Wenda? and I’m already noticing some cool mechanics. Anyone else having trouble with the timing windows? Still, the core gameplay vibes are solid.