
Why Specify the MB45-229NBR Bonded Nitrile Seal?
What Can a Leak Around a Connection Reveal?
A damp patch around a plug or fitting may look like a simple seal failure. In practice, the leak can originate from the sealing surface, the connection itself or the fluid system. Replacing the visible seal without identifying the cause may bring the same problem back after the equipment restarts.
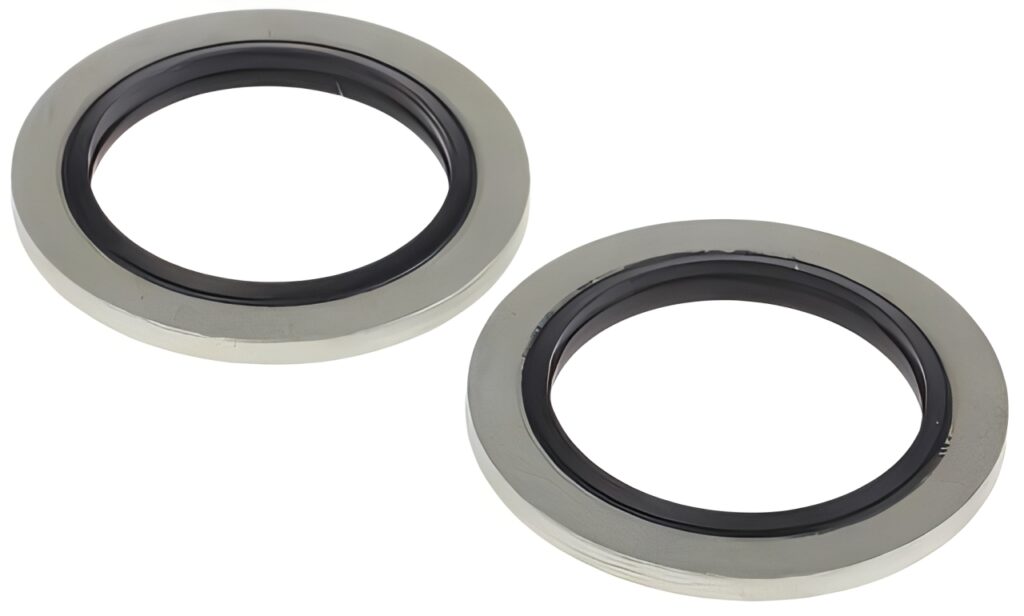
The MB45-229NBR Nitrile Rubber Seal from RS PRO is listed as a bonded seal with a 16.7 mm inside diameter, 24 mm outside diameter and 1.5 mm thickness. Its stated operating temperature range is −10°C to +80°C.
These details help maintenance teams identify the correct replacement when the equipment specifies this part. They do not, by themselves, establish compatibility with every fitting, fluid or operating pressure.
Why Trace the Leak Before Removing the Part?
Fluid can travel along a surface before forming a visible drop. The point where it collects may therefore be some distance from the point where it escaped.
Follow the site’s isolation procedure, then inspect the connection and surrounding area. Look for a clear path from the joint, as well as signs of damage to nearby hoses, threads or components. Record the position of the leak before cleaning the assembly.
This first inspection makes the repair more precise. If the seal is sound but an adjoining component is cracked, changing the seal alone will not solve the problem. It also gives technicians a useful comparison when they check the equipment after reassembly.
How Can the Connected Hardware Affect Sealing?
A bonded seal works as part of an assembly. The component pressing against it must provide the correct contact area, and the adjoining surface must be suitable for sealing. Wear or damage on either side can undermine a correctly selected replacement.
Where the joint uses a filling or drain plug, compare the existing hardware with the equipment specification. The Hydraulic Filling & Drain Plugs range is relevant when a plug itself needs assessment or replacement. Its dimensions and sealing arrangement must be checked independently against the machine.
Keep the removed parts together during inspection. This helps the technician compare their contact surfaces and identify whether the seal was seated evenly.
What If the Fitting Cannot Be Identified?
A previous repair may have introduced a fitting that differs from the machine drawing. Similar looking threads can have different forms, so forcing an uncertain component into place risks damaging the connection.
Hydraulic Thread Identification Kits can help identify an unfamiliar hydraulic connection. Thread Pitch Gauges can assist with one part of that check.
Thread identification does not establish that the MB45-229NBR is the right seal. The required bore, outside diameter, seating surface and equipment specification must still agree before the joint is reassembled.
Why Check the Fluid as Well as the Seal?
The product listing identifies nitrile rubber as the seal material. Nitrile is commonly used with many oil-based fluids, but actual suitability depends on the formulation and conditions in the machine.
Check the fluid specified for the equipment, especially if maintenance records show that it has changed. The Hydraulic Fluid range illustrates why identifying the exact fluid matters: products can differ substantially in composition and intended use.
The seal’s stated −10°C to +80°C range should also be compared with the temperature at its location in the assembly. If fluid compatibility or operating conditions cannot be confirmed, consult the relevant technical documentation before approving the replacement.
How Can an Open Connection Be Protected During Repair?
Once a plug or fitting has been removed, the open connection can admit dust and debris. A clean sealing surface offers little benefit if particles enter the system while the repair is underway.
Where suitable for the connection, Hydraulic Blanking Caps can help protect an opening temporarily. Choose a cap that fits correctly and follow the site’s procedures for keeping the work area clean.
Before reassembly, check that no temporary protection remains inside the joint. Inspect the new seal for damage and confirm that the mating surfaces are ready to receive it.
What Does the Removed Seal Tell the Technician?
Keep the old seal long enough to examine it. Uneven compression, cuts, swelling or a mark across its sealing area can provide clues about why the joint leaked.
Compare those observations with the condition of the adjoining hardware. A repeated mark in the same location may point to a surface defect. A distorted seal may call for a closer check of fit or assembly practice. The inspection should inform the repair rather than become a reason to reuse a damaged part.
Note the findings in the maintenance record. If the joint leaks again, the next technician can see what was found and changed during the previous visit.
Why Does System Cleanliness Matter After Replacement?
A repaired joint is only one part of a fluid system. If the work revealed contamination, the wider circuit may need attention according to the equipment manufacturer’s procedure.
Appropriate Hydraulic Filters may form part of that system’s contamination control. A filter should be selected to the machine specification; changing one does not correct a damaged sealing face or an unsuitable replacement seal.
After reassembly, return the equipment to service through its approved procedure and check the joint for leakage under the specified operating conditions. Record the result so the repair can be distinguished from a temporary reduction in visible seepage.
What Makes This Seal a Reliable Maintenance Choice?
The RS PRO MB45-229NBR provides a defined bonded-seal option for an assembly that calls for its dimensions, nitrile material and stated temperature range. Its value lies in being selected for the correct joint and installed after the source of leakage has been properly assessed.
A clear maintenance record should identify the part fitted, the condition of the removed seal, any hardware changed and the outcome of the final check. That information makes future fault finding faster and helps teams recognise a recurring joint problem before another replacement is attempted.