
Why Use a Stanley Corded Nail Gun for Neat Interior Trim?
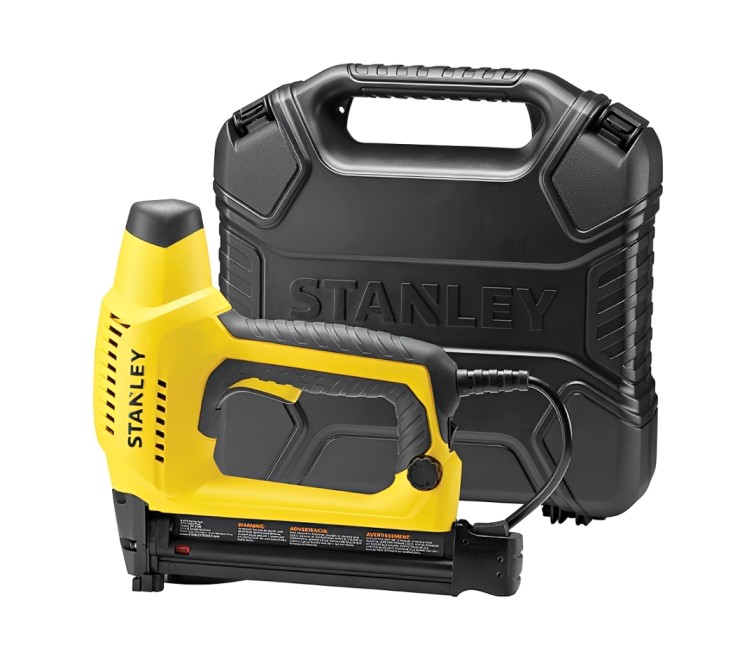
Decorative trim can transform a plain room, but the finish depends on details that are easy to overlook. A slightly tilted fixing, a split timber edge or inconsistent spacing can spoil an otherwise careful installation. A Stanley Corded Nail Gun helps reduce the repetitive effort of driving small brads, allowing the operator to concentrate on positioning and the appearance of the finished surface.
For projects involving narrow mouldings, light timber panels and small joinery repairs, the Stanley Corded Nail Gun provides electrically powered fastening without an air compressor. The 6-TRE650 accepts specified Type-J headed brads, and its adjustable driving force helps the user work with different materials. However, it is intended for appropriate finishing applications rather than structural construction.
Why Does Preparation Matter More Than Fastening Speed?
A nailer can secure a piece quickly, but it cannot correct inaccurate cutting or a poorly aligned joint. Before starting, check that the timber is dry, cut to length and resting flat against the receiving surface. Any bowing, gaps or uneven contact can become more obvious after the fasteners are installed.
Think about the final appearance as well. A painted skirting board allows minor brad holes to be filled, whereas clear-finished timber exposes almost every mark. Planning the fixing positions before making the first hole reduces avoidable rework.
Lay Out the Trim Before Loading the Tool
Arrange each piece in its intended order and check the corners or joints. Mark locations where the brads will grip suitable backing, avoiding hidden services, fragile edges and sections that cannot safely support the fixing.
A simple dry run also reveals where the power cable might catch on a workpiece. Keep the cord behind the operating area and arrange the bench so the material does not shift while you work.
Which 6-TRE650 Features Support Careful Work?
Stanley’s electric nailer uses a mains-powered mechanism, a comfortable grip and a non-marring nose that helps limit surface marks. The selectable high and low driving force offers some adjustment when moving between softer and denser materials, although test firings remain essential.
The tool supports Stanley Type-J headed brads in five published lengths: 15, 20, 25, 30 and 32 mm. A loading window helps the user monitor remaining fasteners, while its approximately 2.4 m cable suits a nearby workbench socket.
Choose Brad Length for the Materials
The correct brad must hold the fitted piece without passing dangerously through its backing. Measure the trim, assess the substrate and allow for an appropriate fixing depth. Do not assume that the longest supported brad provides the strongest or safest result.
For thin decorative pieces, excessive length can create unnecessary risk. Conversely, very short brads may not provide enough grip. The best choice reflects the actual joint rather than an arbitrary standard.
How Can You Keep Fixing Lines Even?
Neatly spaced fixings can make later filling and painting simpler. Establish reference points from the ends of each trim section, then position additional fixings according to the substrate and the workpiece’s tendency to lift.
Reliable Tape Measures make it easier to check repeated distances along skirting, picture-frame moulding or narrow battens without relying on estimates. Mark lightly where necessary and keep the marks clear of visible finished areas.
Test on Offcuts Before Working on the Final Piece
Use a spare piece of the same timber and thickness to check how deeply the brads enter. If a head remains proud, review the power setting and the material beneath the test piece. If the tool marks the surface, reduce unnecessary pressure and confirm the protective nose is clean.
Also examine the back of the sample for protruding tips. That quick check helps prevent damage to underlying surfaces and provides better evidence than judging the nailer’s performance by sound alone.
What Projects Benefit Most From This Approach?
Small interior details often benefit from controlled brad placement. Examples include decorative beading, lightweight cabinet trim, door-frame finishing pieces and certain non-structural repair tasks. The operator can secure multiple points without repeatedly reaching for loose nails and a hammer.
However, brads do not automatically replace screws, glue or purpose-designed structural connections. Wider boards, highly stressed joints and safety-critical fixtures need fastening methods selected for the forces they will experience.
Make Finishing Part of the Installation
After fastening, inspect the piece in raking light to reveal dents or raised grain. Address any suitable small holes using a filler compatible with the surface finish, following the filler manufacturer’s curing guidance.
Before painting, carefully selected Sandpaper, Sanding Blocks & Pads can blend properly cured filled areas into the surrounding timber. Work with the grain where appropriate, and avoid removing so much material that decorative profiles lose their shape.
How Do You Avoid Common Workshop Problems?
Electrical safety and control matter as much as neat fastening. Inspect the cord before use, work on a stable surface, wear appropriate eye protection and keep hands away from the potential brad path. Never fire towards a person or rely solely on a safety switch to prevent an accident.
If feeding becomes irregular, stop work and unplug the nailer before checking the magazine or clearing a jam in accordance with its instructions. Incorrect brad types, damage or debris can interrupt the sequence, and repeated trigger pulls may make a problem worse.
Final Thoughts: A Cleaner Result Starts With a Better Routine
The 6-TRE650 can make light trim fitting more efficient, but its greatest practical value comes when careful layout, correct fastener selection and finish checks accompany every stage. Treat the tool as one part of a measured woodworking process, not a shortcut around preparation.
When the project ends, unplug the nailer, inspect it for damage and store it with the correct accessories. Well-organised Tool Bags can keep essential measuring tools and finishing supplies together, helping the next job begin with less searching and fewer interruptions.